
LEMP là một nhóm các phần mềm mã nguồn mở được cài trên máy chủ Webserver, được viết tắt từ Linux, NGINX (Engine x), MySQL, và PHP. LEMP tương tự như LAMP chỉ khác web server trên nền tảng Nginx thay vì Apache. Đặc điểm Nginx là một web server mã nguồn mở hoạt động nhanh và ít tài nguyên hệ thống hơn Apache. Đối với các hệ thống nhẹ sự khác nhau giữa Apache và Nginx là không đáng kể, tuy nhiên ở các hệ thống nặng thì Nginx thể hiện sự vượt trội hơn rất nhiều so với Apache.
Dưới đây là các bước thực hiện cài đặt hoàn chỉnh LEMP.
Trước khi cài đặt các service ta cần update hệ thống cập nhật các bản vá mới nhất
[root@localhost ~]# yum update -y
Mục lục
Bước 1: Cài đặt PHP
(Trong bài viết này kỹ thuật chúng tôi hướng dẫn bạn cài đặt PHP version 7, với các phiên bản php khác người dùng thực hiện tương tự)
Cài đặt thêm gói epel và remi repository
[root@localhost ~]# rpm -Uvh https://dl.fedoraproject.org/pub/epel/epel-release-latest-7.noarch.rpm

[root@localhost ~]# rpm -Uvh https://mirror.webtatic.com/yum/el7/webtatic-release.rpm
Cài đặt PHP-FPM 7
[root@localhost ~]# yum install php70w php70w-bcmath php70w-cli php70w-common php70w-dba php70w-devel php70w-embedded php70w-enchant php70w-fpm php70w-gd php70w-imap php70w-interbase php70w-intl php70w-ldap php70w-mbstring php70w-mcrypt php70w-mysqlnd php70w-odbc php70w-opcache php70w-pdo php70w-pdo_dblib php70w-pecl-xdebug php70w-pgsql php70w-phpdbg php70w-process php70w-pspell php70w-recode php70w-snmp php70w-soap php70w-tidy php70w-xml php70w-xmlrpc
Cài đặt xong khởi động dịch vụ PHP-FPM
[root@localhost ~]# systemctl start php-fpm
Có thể kiểm tra lại trạng thái hoạt động và phiên bản đang sử dụng bằng:
[root@localhost ~]# php-fpm -v
PHP 7.0.7 (fpm-fcgi) (built: May 28 2016 07:56:50)
Copyright (c) 1997-2016 The PHP Group
Zend Engine v3.0.0, Copyright (c) 1998-2016 Zend Technologies
    with Zend OPcache v7.0.6-dev, Copyright (c) 1999-2016, by Zend Technologies
Đặt chế độ tự khởi động dịch vụ khi khởi động hệ thống
[root@localhost ~]# systemctl enable php-fpm
Created symlink from /etc/systemd/system/multi-user.target.wants/php-fpm.service to /usr/lib/systemd/system/php-fpm.service.
Như vậy là hoàn thành cài đặt PHP 7 trên Centos 7
Đối với các phiên bản PHP thấp hơn muốn cấp lên PHP 7 thì cần thận trọng cân nhắc để đảm bảo việc update không ảnh hưởng tới hoạt động ổn định của hệ thống sau khi nâng cấp. Trong trường hợp bạn vẫn muốn nâng cấp, bạn có thể thực hiện:
[root@localhost ~]# yum install yum-plugin-replace
[root@localhost ~]# yum replace php-common --replace-with=php70w-common
Bước 2: Cài đặt MySQL
Cài gói thêm gói repo
[root@localhost ~]# yum install http://dev.mysql.com/get/mysql-community-release-el7-5.noarch.rp
Liệt kê và Enable gói repo mysql.*
[root@localhost ~]# yum repolist enabled | grep "mysql.*-community.*"
Tiến hành cài đặt
[root@localhost ~]# yum install mysql-community-server -y
Chờ quá cài đặt thành công thì khởi động dịch vụ
[root@localhost ~]# systemctl start mysqld
Đặt chế độ khởi động dịch vụ mysql khi khởi động hệ thống
[root@localhost ~]# systemctl enable mysqld
Kiểm tra phiên bản MySQL vừa cài đặt
[root@localhost ~]# mysql -v
Welcome to the MySQL monitor.  Commands end with ; or \g.
Your MySQL connection id is 4
Server version: 5.6.31 MySQL Community Server (GPL)

Copyright (c) 2000, 2016, Oracle and/or its affiliates. All rights reserved.
Tiến hành đăng nhập vào MySQL và thiết đặt mật khẩu cho user root
[root@localhost ~]# mysql_secure_installation

NOTE: RUNNING ALL PARTS OF THIS SCRIPT IS RECOMMENDED FOR ALL MySQL
      SERVERS IN PRODUCTION USE!  PLEASE READ EACH STEP CAREFULLY!

In order to log into MySQL to secure it, we'll need the current
password for the root user.  If you've just installed MySQL, and
you haven't set the root password yet, the password will be blank,
so you should just press enter here.

Enter current password for root (enter for none):
OK, successfully used password, moving on...

Setting the root password ensures that nobody can log into the MySQL
root user without the proper authorisation.

Set root password? [Y/n] Y  <= Nhấp Y + Enter
New password:  <= Nhập mật khẩu mới cho tài khoản root
Re-enter new password: <= Nhập lại mật khẩu
Password updated successfully!
Reloading privilege tables..
 ... Success!


By default, a MySQL installation has an anonymous user, allowing anyone
to log into MySQL without having to have a user account created for
them.  This is intended only for testing, and to make the installation
go a bit smoother.  You should remove them before moving into a
production environment.

Remove anonymous users? [Y/n] <= ENTER
 ... Success!

Normally, root should only be allowed to connect from 'localhost'.  This
ensures that someone cannot guess at the root password from the network.

Disallow root login remotely? [Y/n] <= ENTER
 ... Success!

By default, MariaDB comes with a database named 'test' that anyone can
access.  This is also intended only for testing, and should be removed
before moving into a production environment.

Remove test database and access to it? [Y/n] <= ENTER
 - Dropping test database...
 ... Success!
 - Removing privileges on test database...
 ... Success!

Reloading the privilege tables will ensure that all changes made so far
will take effect immediately.

Reload privilege tables now? [Y/n] <= ENTER
 ... Success!

Cleaning up...

All done!  If you've completed all of the above steps, your MariaDB
installation should now be secure.

Thanks for using MySQL!
Bước 3: Cài đặt NGINX
NGINX không có sẵn trên CentOS 7, để cài phiên bản mới nhất của NGINX trước tiên ta tạo 1 gói repo cho Nginx:
Tạo gói repo: nginx.repo với nội dung
[root@localhost ~]# vi /etc/yum.repos.d/nginx.repo
[nginx]
name=nginx repo
baseurl=http://nginx.org/packages/centos/versionOS/$basearch/
gpgcheck=0
enabled=1
Trong đó thay versionOS bằng tên phiên số phiên bản tương ứng. Ví dụ: CentOS 7 thì thay versionOS bằng 7.
Sau đó lưu lại và bắt đầu cài đặt NGINX:
[root@localhost ~]# yum install nginx -y
Cài đặt thành công ta có thể check phiên bản NGINX hiện tại là phiên bản nào bằng lệnh:
[root@localhost ~]# nginx -v
              nginx version: nginx/1.10.1
Khởi động NGINX:
[root@localhost ~]# systemctl start nginx
Đặt chế độ NGINX tự khởi động khi khởi động lại máy chủ:
[root@localhost ~]# systemctl enable nginx
Chú ý mở port 80 trên Firewall:
[root@localhost ~]# firewall-cmd --permanent --add-port=80/tcp

[root@localhost ~]# firewall-cmd --reload
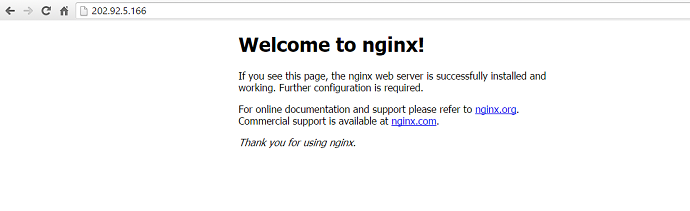
Truy nhập địa chỉ IP của server nếu xuất hiện màn hình như bên dưới là thành công:
Bước 4: Cấu hình tạo virtual host trên NGINX
Các file sẽ cấu hình:
File /etc/nginx/nginx.conf – file cấu hình chung cho nginx
File /etc/nginx/conf.d/tên-file.conf – file cấu hình vhost cho domain mong muốn.
Cấu hình file cấu hình chung :
[root@localhost ~]# vi /etc/nginx/nginx.conf user nginx; <= Gán quyền cho user nginx worker_processes 1; <= Cần chỉnh lại worker_processes bằng với số lượng CPU core bạn được sử dụng error_log /var/log/nginx/error.log warn; <= Cấu hình đường dẫn file error_log pid /var/run/nginx.pid; events { worker_connections 1024; <= số kết nối tối đa tai 1 thời điểm; mặc định là 1024; trường hợp bạn muốn nâng cao hơn có thể tùy chỉnh nhưng không nên cao hơn quá 2048. } http { include /etc/nginx/mime.types; default_type application/octet-stream; log_format main '$remote_addr - $remote_user [$time_local] "$request" ' '$status $body_bytes_sent "$http_referer" ' '"$http_user_agent" "$http_x_forwarded_for"'; access_log /var/log/nginx/access.log main; <= Cấu hình log access sendfile on; server_tokens off; <= Cấu hình ẩn phiên bản nginx đang sử dụng #tcp_nopush on; keepalive_timeout 65; #gzip on; fastcgi_buffers 8 16k; fastcgi_buffer_size 32k; fastcgi_connect_timeout 300; fastcgi_send_timeout 300; fastcgi_read_timeout 300; include /etc/nginx/conf.d/*.conf; <= Đường dẫn gán file cấu hình virtual hosts cho từng site }
Sau đó lưu lại cấu hình. Test lại kết quả bằng cách tạo thử 1 virtual host ảo cho domain demo.com
Vào thư mục conf.d và tạo 1 file demo.com.conf được copy từ file cấu hình mặc định default.conf
[root@localhost ~]# cd /etc/nginx/conf.d/
[root@localhost conf.d]# cp default.conf demo.inet.vn.conf
Chỉnh sửa lại file demo.com.conf
[root@localhost conf.d]# vi demo.com.conf
 server {
    listen       80 ; <= Port mặc định
    server_name  demo.com ; <= Nhập tên miền mong muốn
    #charset koi8-r;
    #access_log  /var/log/nginx/log/host.access.log  main;
    location / {
        root   /home/demo.com/ ;  <= đường dẫn document root
        index  index.html index.htm index.php;
    try_files $uri $uri/ /index.php?;
    }
    #error_page  404              /404.html;
    # redirect server error pages to the static page /50x.html
    #
    error_page   500 502 503 504  /50x.html;
    location = /50x.html {
        root   /home/demo.com/; <= đường dẫn document root
    }

    # proxy the PHP scripts to Apache listening on 127.0.0.1:80
    #
    #location ~ \.php$ {
    #    proxy_pass   http://127.0.0.1;
    #}
    # pass the PHP scripts to FastCGI server listening on 127.0.0.1:9000
    #
    location ~ \.php$ {
        root           /home/demo.com/; <= đường dẫn document root
        fastcgi_pass   127.0.0.1:9000; => Có thể cấu hình UNIX Socket nếu muốn
        fastcgi_index  index.php;
        fastcgi_param  SCRIPT_FILENAME  $document_root$fastcgi_script_name;
        include        fastcgi_params;
    }
    # deny access to .htaccess files, if Apache's document root
    # concurs with nginx's one
    #
    #location ~ /\.ht {
    #    deny  all;
    #}
}
Lưu lại cấu hình và khởi động lại dịch vụ NGINX
[root@localhost demo.com]# systemctl restart nginx
Tạo 1 thư mục gốc như đã cấu hình ở bước trên
[root@localhost nginx]# mkdir /home/demo.com
Tạo 1 file test index.php
[root@localhost demo.com]# vi index.php
Trỏ tên miền về server và kiểm tra kết quả, chúc bạn thành công.
Comments